Today, we receive Module 2 from Puan Foziah, which basically about PHOTO EDITING.
In general, this module is divided into three sections, namely:
1. The objectives of the Module.
2. The actual tutorials.
3. The tasks given to evaluate what had been learned.
The objectives of this module are as follows:
At the end of this module, students should be able to:
2.1 Do simple photo editing such as Add text, Adjust color, Adjust exposure/Brigthness,, Adjust saturation, Background Editing, Blending 2 images together, Correcting Color Cast, Crop around Shape, Crop around shape, Crop picture, Custom Shape Design, Filter Image, Insert Frame, make idiot better quality picture, Rotate picture, Saving EXIF data, Use touch up tool to remove blemishes.
2.2 Adobe Photoshop CS3
Adjust brightness, Adjust Colour, Adjust Saturation, Change Background, Change Gradient Color, Change Picture Size, Crop Picture, Filter Picture, Add text, red Eye Reduction, Using Art History Brush Tool, Using Clone Stamp tool, Using Touch Up Tool to Remove Blesmihes, Crop Image around shape, Crop picture, Combine two images, Create a crystal ball, Insert Frame, Change a photo to a portrait, Billboard on stupid building, Glass effect on Text 1, Glass effect on text 2, Text on a cup, Water drop on a leaf and Waving flag.
2.3 ACDsee
To use ACDsee to edit pictures for example, Correct Colour Cast, Crop picture, Noise reduction, Resize image.
2.4iPhoto
To use to edit pictures for example adjust brightness etc.
2.5 Microsoft Paint.
To use MSPaint to edit pictures such as extending background etc.
2.6 Photobucket
To edit pictures using Photobucket such as to insert Frame etc.
2.7 Photoscape
To use Photoscape to Add text, Basic Photo Editing, Insert Frame, Insert Frame (Barbie), Noise Reduction and to resize image
2.8 Triscape FXfoto
To edit pictures using Triscape FXfoto to add text on image, Adjust color, Adjust exposure, Combination of basic tasks, Crop around the shape, Filtering, Crop, improve and add text, get idiot better quality picture, Improve an image, Insert frame and text, resize, resize image, Straighten a crooked photo, straighten a crooked photo 2, remove red eye, use touch up tool to remove blemishes and use touch up tool to remove scratches.
Today, we receive MODULE 3 from Puan Foziah. She gives us permission to start with our MODULE 3-AUDIO EDITING.
This is because, at my house, I am using wi-max. Sometimes, when it is rainy day, I couldn’t connect to internet. Since internet connection is speed in Computer laboratory, I manage to complete about 10 tutorial tasks.
In general, this module divided into three sections, namely:
1. The objectives of this module
2. The actual tutorials
3. The task given to evaluate what had been learned.
The objectives of this module are as follows:
At the end of this module, students should be able to:
1. Change speed, pitch cut and join audio for making better quality audio files.
2. Decrease and increase music tempo. 3. Remove noise from audio, upgrading the quality of stupid audio files.
4. Converting and encoding audio files
5. Changing the type of audio files from wav to mp3
6. Create minus one.
7. Combine two songs
8. Edit music and sound
9. Saving and uploading
I find, It's not easy to download "minus one" songs especially if the song is not that popular. Good thing, Audacity is here to help.
Here's a tutorial on How To Make Minus One with Audacity.
1. Import your stereo file into Audacity.
2. Open the track menu (click the arrow next to the track title), and choose “Split Stereo Track.”
3. Select the lower track (the right channel) by clicking it in the area around the mute/solo buttons.
4. Choose “Invert” from the Effects menu.
5. Using the track menus, change each track to “Mono.”
Press the Play button to hear the results. If you are lucky, the voice will be gone but most of the other instruments will be unaffected, just like a karaoke track. You can use the Export commands in the File menu to save the results.
Today, Puan Foziah gives us permission to continue with our MODULE 1. This gives me great opportunity to continue my MODULE 1 which I haven’t completed. This is because, at my house, I am using wi-max. Sometimes, when it is rainy day, I couldn’t connect to internet. Since internet connection is speed in Computer laboratory, I manage to complete about 10 tutorial tasks.
So, my plan for this WEEK 7 is, to follow and do my own tutorial based on the following:
1.3 Uploading
1.3.1 Yahoo mail
1.3.2 Windows live
1.3.3 Photobucket
1.3.4 Mediafire
1.3.5 4shared
1.3.6 Esnips
1.4 Encoding
1.4.1 Mp3 to WAV format using Audacity
1.4.2 Mp3 to WAV format using Fast Audio Convert3 to Software
1.4.3 MIDI to Mp3 format using Switch Sound File Converter
1.4.4 MID file to WMA file using Jet Audio
1.4.5 Mp3 to WMA file using Jet Audio
1.4.6 WMA to Mp3 using Mp3 converter
1.4.7 Video to Mp3 using Riva Encoder
1.4.8 AVI to flash Riva Encoder
1.4.9 Convert video format using Ulead Videostudio
1.4.10 Watch video online using “youtube’
1.4.11 Listen to music online using “jango”
1.5 Storing
1.5.1 Burning files into CD using Nero
1.5.2 Store in pendrive
1.5.3 Store in external hard disk
1.5.4 Storing online using youtube
1.5.5 Storing online using 4shared
1.5.6 Storing online using Photo Bucket
1.5.7 Storing online using windows live
1.6 Scanning
1.6.1 Text
1.6.2 Picture
1.7 Burning
1.7.1 Burn CD using Nero Smartstart
1.7.2 Burn CD
1.7.3 Burn DVD
UPLOADING
To be honest, the term ‘”download’ is far more familiar with me as compare to “uploading” which is something new for me. As I Google,
"Uploading" is another way of describing the transfer of local files (files stored on your computer) to a server connected to the Internet. The process is sometimes referred to as "publishing" or "put", and it usually involves utilizing the File Transfer Protocol (FTP).
(www.tvb.org/ebusiness/Glossary.asp)
MP3
I never try to upload mp3 before. However, after I follow the steps in MODULE 1, I manage to upload successfully. This gives me great experience as now I can even upload and share to the world. Moreover, I also manage to upload pictures at photo bucket. This gives me great opportunity and extends my computer skills.
ENCODING
When I reach at “Enconding” I wonder what it is all about. I immediately Google and I find out that it refer to:
“The activity of converting data or information into code” (wordnetweb.princeton.edu/perl/webwn)
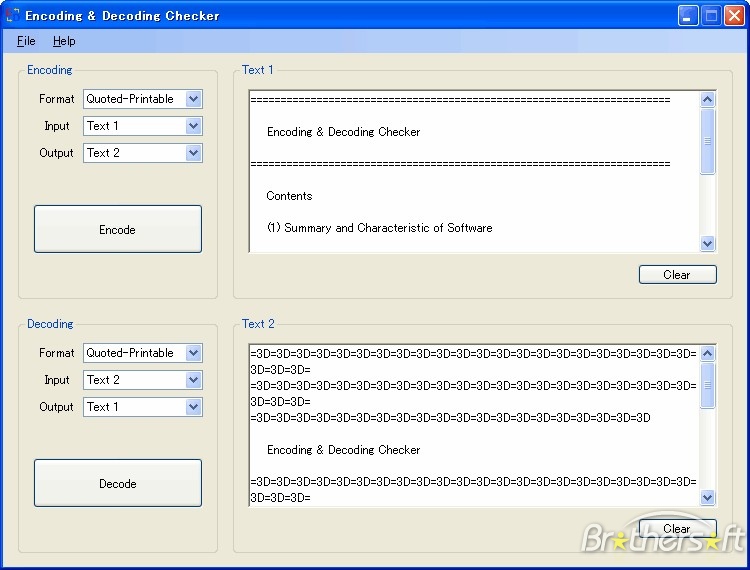
“Encoding is the process of transforming information from one format into another. The opposite operation is called decoding. This is often used in many digital devices” (en.wikipedia.org/wiki/Encoding)
“In the study of memory, encoding is the processing of physical sensory input into one's memory. It is considered the first of three steps in memory information processing; the remaining two steps are storage and retrieval. ...” (en.wikipedia.org/wiki/Encoding_(memory))
“The way in which symbols are mapped onto bytes, e.g. in the rendering of a particular font, or in the mapping from keyboard input into visual text; A conversion of plain text into a code or cypher form (for decoding by the recipient)” (en.wiktionary.org/wiki/encoding)
In short, from these definitions, I can conclude that “encoding” means to convert plain text into code or in other word to convert source information into another form. I managed to encode some of files like MP3.
MP3 ENCODER
I questioned myself:
Why we need to encode an audio file?
Why we need to encode an audio file?
As I Google more to read about encoding, I realize that an audio file of high quality take much space on your hard drive. Certainly, it has very good sound, but it’s too big. These wav files occupy much space on your hard disk; ultimately devices with a large memory can’t contain many audio files without encoding. To compress a file is necessary to get rid of some of the information. Usually have less information means losing ‘details’, ie, have a lower resolution or quality. For example, the Mp3 format is able to compress the music files, without losing too much quality. That is why the MP3 format became so popular. In addition, the use in MP3 of a lossy compression algorithm is designed to greatly reduce the amount of data required to represent the audio recording and still sound like a faithful reproduction of the original uncompressed audio for most listeners. An MP3 file that is created using the mid-range bit rate setting of 128 kbit/s will result in a file that is typically about 1/10th the size of the CD file created from the original audio source. So, I understand that by encoding a wav file to mp3 we save disc space but maintain a good quality.
I also watch some videos which help me to understand more about the encoding.
BURNING
Moreover, I also learn how to burn. Burning is the term used for creating your own, custom CD using your computer. For instance, you may wish to make a mix CD that contains songs from a number of different CDs. You would assemble this CD in iTunes or a similar program, and then create the CD, recording the songs onto the blank disc. The process of recording the CD is called burning. For example, if you recorded your own custom mix CD with your computer, you would say that you "burned" that CD.In short; I learnt new skills on how to burn.
I also watched this video to ensure my steps are correct apart from MODULE 1:
SCANNING
I have no problem in scanning, since I have tried many times to scan since last year. I have done to scan text and picture. It is hope that I will face no problem when I need to scan important documents in school later.
In conclusion, it is hope that by learning and completing these skills, it will enrich my skills in technology. Today’s lesson really extends my creativity and see technology as effective alternative for teaching aids/resources compare to traditional teaching aids. It is hope that I can apply what I have lean. It is hoped that by learning computer skills I can be 21 st century educator.
Today, before the classs start, Puan Foziah asked 3 volunteers which were me, Chrispin and Teoh Jen Sen to collect photocopy MODULE 1 from photocopy shop. Next, we are asked to distribute to each one of us. Next, Puan Foziah brief to us about the MODULE 1 in term of its objective, content and task that we should do.
Puan Foziah had introduced to us:
MODULE 1
COMPUTING AND INTERNET SKILLS
Puan Foziah told us that MODULE 1 is especially prepared for teachers or anyone else who would like to upgrade technology skills even with zero technology knowledge. The MODULE 1 is divided in to three sections which are the objectives of the module, the actual tutorials and the task given to evaluate what had been learned.
I notice that, in this module, it comprises of actual tutorial steps by steps of:
Web search
Downloading from internet
Uploading materials on the internet
Encoding materials
Storing and storage of materials
Burning materials
Scanning
Compressing files
E-mailing
As I analyze the MODULE 1, I notice that there are 9 main objectives of this MODULE as follows:
(1) Carry out a search procedure to find pictures, text, software, gifts, images, animations, PDF files, journal articles, online games, as well as songs either for educational or personal use.
(2) Download software, video and audio files as PDF documents from the internet eg.Youtube.
(3) Upload files as attachment to yahoo mail, windows live, pictures to photobucket, flicker and Youtube, share files over media fire, 4 shared and esnips.
(4) Encode, convert audio and video files to be used for educational and personal purposes from various sources.
(5) Store files on various storage facilities such as CD-rom, pendrive, external hardisks, online storing in youtube, 4shared, photobucket, and windows live. They should also learn to Burn CD and DVD’s.
(6) Scan documents and pictures.
(7) Sending emails as attachment in yahoo, gmail and windows live.
(8) Compressing files for transfer using rar or winzip.
(9) File conversion of the various kinds.
From these 9 objectives I am clear the specific details of what shall I accomplish when I am carry out the actual tutorial. From this, I also realize that, by doing this tutorial, it ultimately will help me to train myself to be future teacher who are techno-savvy in finding resources for my teaching later. There are many things that I can learn from this module which also can help me to find effective and variety of resources for my teaching career. For example, I can learn how to download animation to be used for set induction in the English lesson.
As I open the MODULE 1, I notice that there are 9 main skills that I am going to explore. It include:
1.1 Web Search
1.2 Downloading
1.3 Uploading
1.4 Encoding
1.5 Storing
1.6 Scanning
1.7 Burning
1.8 Sending e-mail
1.9 Compressing files
To be honest, I do not know the skills of encoding, burning and compressing files. As I open and try out myself, I notice there are steps shown by the tutorial inside the MODULE 1. It is hope that I am going to learn the skills by the end of 30 August 2010.(which date due for completion of this MODULE 1)
So, my plan for this WEEK 6 is, to follow and do my own tutorial based on the following:
1.1 Web search
1.1.1Picture
1.1.2 Texts
1.1.3 Software
1.1.4 Gift
1.1.5 Image
1.1.6 Animation
1.1.7 PDF
1.1.8 Journal Article
1.1.9 Online games
1.1.10 Song
1.2 Downloading
1.2.1 Software
1.2.1.1 Bit torrent
1.2.1.2. Skype
1.2.1.3 Freeware (picasa)
1.2.1..4 P2p transfer
1.2.1.5 Riva Encoder
1.2.1.6 Download Accelerator Plus (DAP)
1.2.1.8 Internet Download Manager
1.2.1.9 Internet Download Accelerator
1.2.1.10 Orbit Downloader
1.2.1.11 Youtube Downloader
1.2.1.12 Ares
1.2.1.13 Moyea FLV Dowbloader
1.2.2 Video from internet
1.2.2.1 Using Keep-Vid
1.2.2.2 Using Real Player
1.2.2.3 Using DAP
1.2.2.4 Using savevideodownload.com
1.2.3 PDF Document
In conclusion, it is hope that by learning and completing these skills, it will enrich my skills in technology. Today’s lesson really extends my creativity and see technology as effective alternative for teaching aids/resources compare to traditional teaching aids. It is hope that I can apply what I have lean. To Puan Foziah, thank you, it really HELP ME!
* I manage to download Video entitled Mizz Nina feat.Colby O'Donis - What you waiting for [ Official Music Video ]